Introduction
I am going to be making a 360 video in Maya to be viewed for entertainment, it being set in a catacomb and based on the Dark Souls Trilogy, along Skye the Children of Light for art style. It will last 150 seconds at 30fps, unless this is changed past planning.
Setup
To start I set the background color as orange for visibility, reusing an old project, having copied it as it had all the VR settings set up already, meaning I only had to change the frame rate to 30 and the duration to 4500 frames (150×30).
While producing I kept the render quality at 540 HD as any more would be excessive for production alone, but plan to go to 4K later when rendering properly. Then finally setting the render device to GPU to make use of the computer’s hardware, setting the render output properly so I wouldn’t lose it and making sure the camera used for rendering was a VR Camera.
Reconsiderations
I did also rethink the idea when coming back to it, given the time I wanted to cut the cliff and city scene to focus more on the king, making less transitions that could possibly confuse the player and letting this scene, the main scene, have the time it needs. Along with this extra time it could also be more clear, actually dealing with the king instead of just teleporting past him.
For this I created a new timeline to work from:
In void, flame come to, view coming from that – 5 secs (5)
Wake in cavern, lying down – 5 secs (10)
Gets up – 5 secs (15)
Time to look around the starting chamber – 10 secs (25)
Look up stairs and fade to black and back on the top – 5 secs (30)
Look at door – 5 secs (35)
Push door open – 10 secs (45)
Look at room inside – 10 secs (55)
Walk inside, up to throne half way – 10 secs (65)
Eyes light up – 5 secs (70)
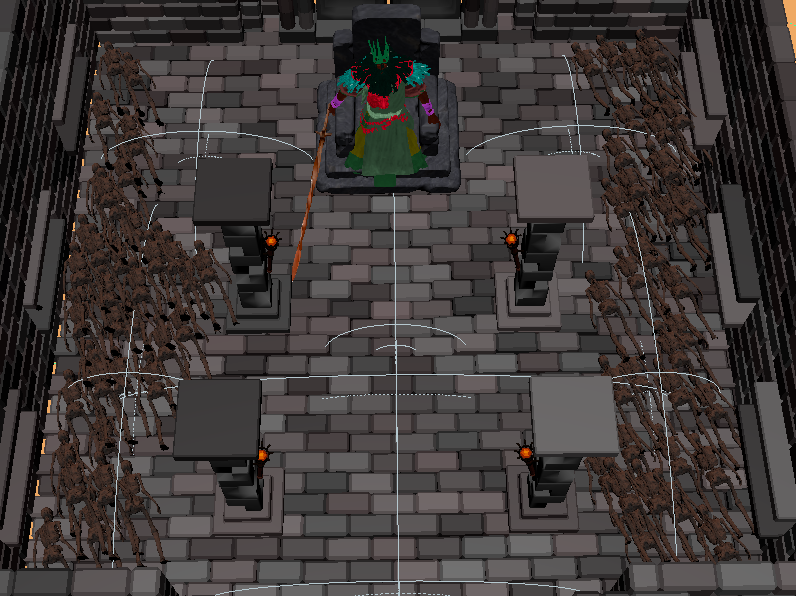
Skeletons start to light on fire, giving to the king, their body now also being covered in flames – 15 secs (85)
King slashes at you – 5 secs (90)
View goes back into the flame, it snuffing out – 5 secs (95)
They reach out, the flame relighting – 5 secs (100)
Wake to see the king walking away from you on the ground – 5 secs (105)
The flames change to power you, you kindling like the king as you get up – 10 secs (115)
The king turns as you reach out your hand, the flames burning into him – 15 secs (130)
You open the door behind him, the light blinding you – 20 secs (150)
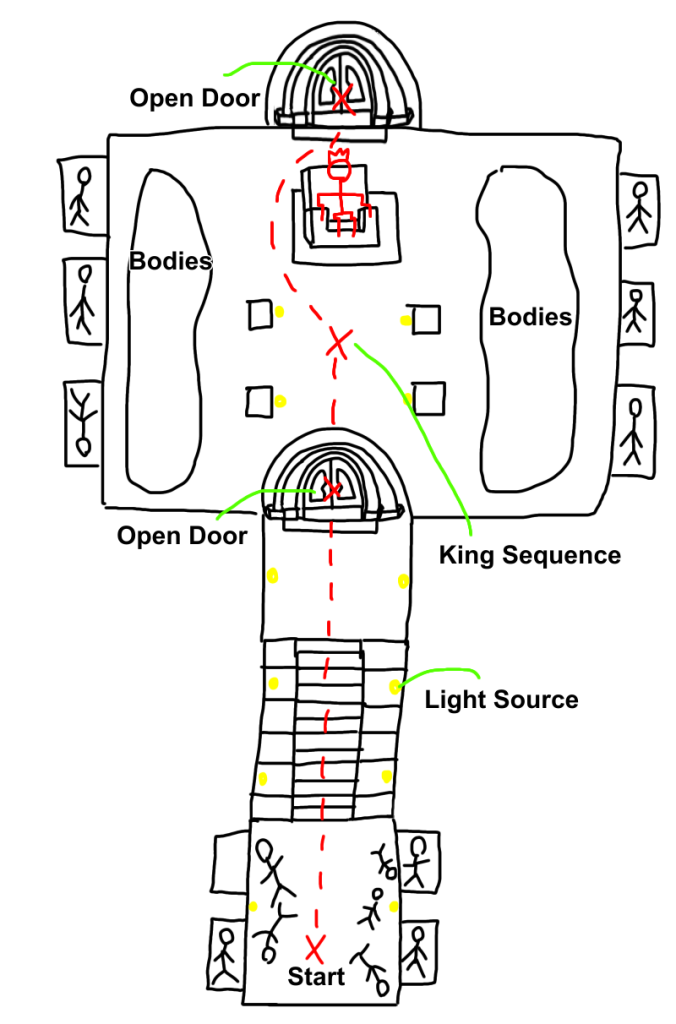
Layout Plan
With this all set I could get to work making the area, but first I wanted a rough sketch to work off, making this so I know what to create instead of just jumping in aimlessly.
Construction
MASHED
Basic Construction:
Alot of the structure will be made of bricks, luckily they are easy to make, just being a cube twice as long as it is wide or tall, then bevelled by 0.25 to give some more texture. Without MASHED i would need to place each brick by itself, however with MASHED i could take that one brick, use Distribute to move it to the location (set to 1 as it was use just to move it), then use Replicate multiple times to make walls and such from that one brick.
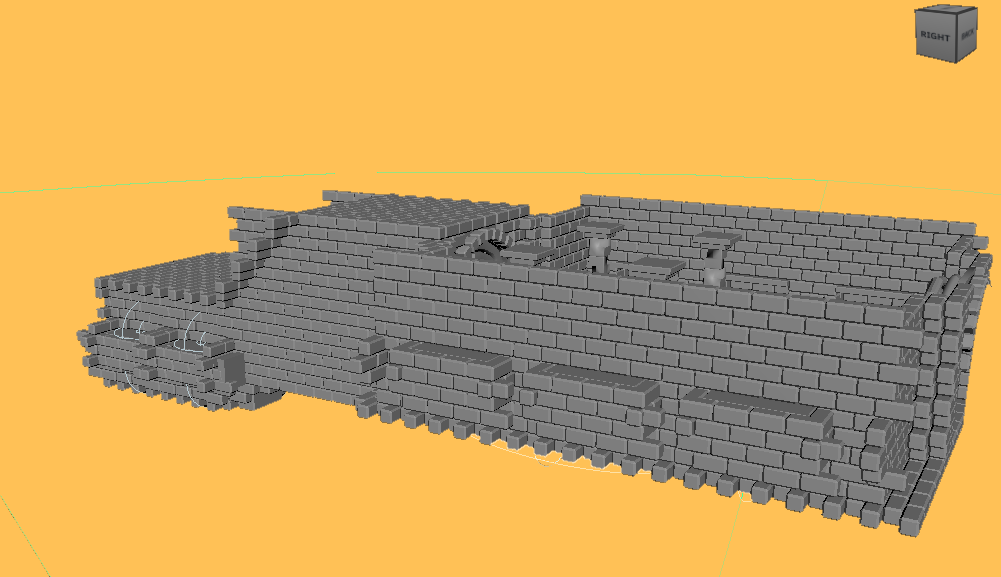
(Example pic of first area walls)
I did also use flatter bricks for the burial chambers as they tend to just be one slab instead of individuals for the top and bottom, then larger bricks for the side of the stairs to add variation, and to highling the stairs, bringing the eyes to the stairs as there is more going on at them compared to the larger bricks.
Labelling:
Finally for this first room and future rooms I labelled all MASHED networks for them with a Letter, A for the beginning room for example. Then also using different colors aswell, this was all to try and sort each area, the Letters keeping them in sections because it’s Alphabetically ordered, and the colors let me see when each section ends and another starts without reading the names.
Transform:
Later on I figured out that I can use the Transform Module to move the networks from 0, 0, 0, instead of using Distribute, leaving it open incase I needed it. I also used Offset with Falloff objects to make certain parts of walls indent for texture instead of being flat.
Color:
Color networks would normally work outside of Arnold Renders, however I was given a video to make them work inside of Arnold Renders. This was important as it means I can use the Sliders to set Randoms for the color instead of it being static, allowing me to make the bricks vary and this also helped for the fire sections of the sequence too.
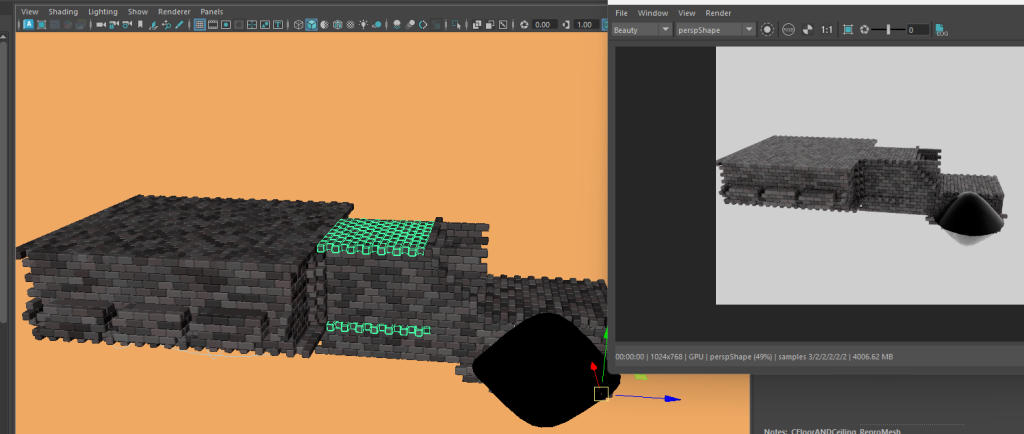
Construction not colored
Scene Colored (Render View to show it works in that aswell)
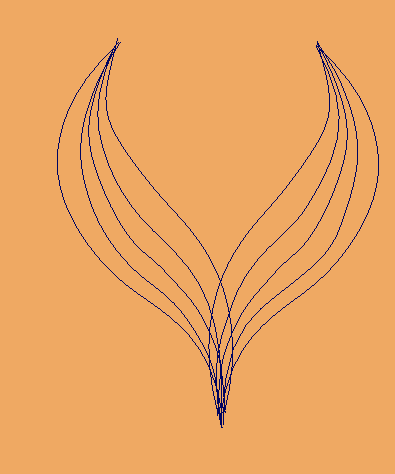
Creating the Fire Effect:
I did also end up using Curves, Curve networks and Random networks for the Fire effect. Setting up the Curves for the fire like so.
Then adding in a sphere I Replicated along the Curve, adding a Color network like described before for the differing color, adding in ambient glow and using the preset of glass so the flames were semi see-through aswell.
Lastly for the Random Network I made it go far in each direction, turning off the Curve network so the flames spread out, then using the Strength slider with Key Frames so it goes down, finally having the Key Frame turn on the Curve network, slowly turning it up so the flame grows instead of just jumping up. Then I finally have the curve tied to the other Curve’s location, then back to make the swish instead of it being static. This then results in this when rendered.
I noticed after seeing this that it was too yellow, so I changed it to orange like I wanted after seeing this.
Doors:
However certain things couldn’t be made with just MASHED, like the door frames needed changing from Torus’ with the Multi-Cut Tool and, making the arches, then using spheres flattered to make the doors themselves, and then flattened Torus for the frame behind that. Using MASHED with this would have been tricky, as rotating in MASHED tends to move the object really far, so they need to be moved back, and rotating along the frame could be an issue too.
The first door worked by using Transform and Random nodes with Falloff Objects, when the Falloff object gets closer, it slowly turns on the Random node to rotate and move the door into the open position.
Considerations
I realised when told about VR Experiences that movement can be more troublesome than expected, most of my movement is fine as it is slow and doesn’t change much than a general direction.
However one problem I was warned of was going up stairs, apparently leading to motion sickness even if it is consistent movement. To fix this I plan on changing the stairs area to stop at the bottom, then fade to black which I can add in Premier Pro after rendering, then fade back in at the top, fixing the problem of going up the stairs, by just teleporting them.
I plan on using this fade to black whenever there is a transition, lessening the impact and making it less jarring for the user.
Found Assets:
When I got to the final room I went and found assets from Sketch Fab, these being a better throne, torches, corpses, Gwyn and a replacement sword for him. I then simply dragged them into the project, making sure they were file types that worked with Maya, when dragged in they would integrate, having their textures and layouts, for example Gwyn came fully textured and rigged. However, I realised that because I bound Gwyn in my external drive and not on the pc drive I could only use the project via my external, which I had planned, but locks me out of using it on multiple PCs for rendering. The fix would be to re-add Gwyn in the PC drive, but by this point I had already rigged alot of animations, making it quite undesirable to fix.
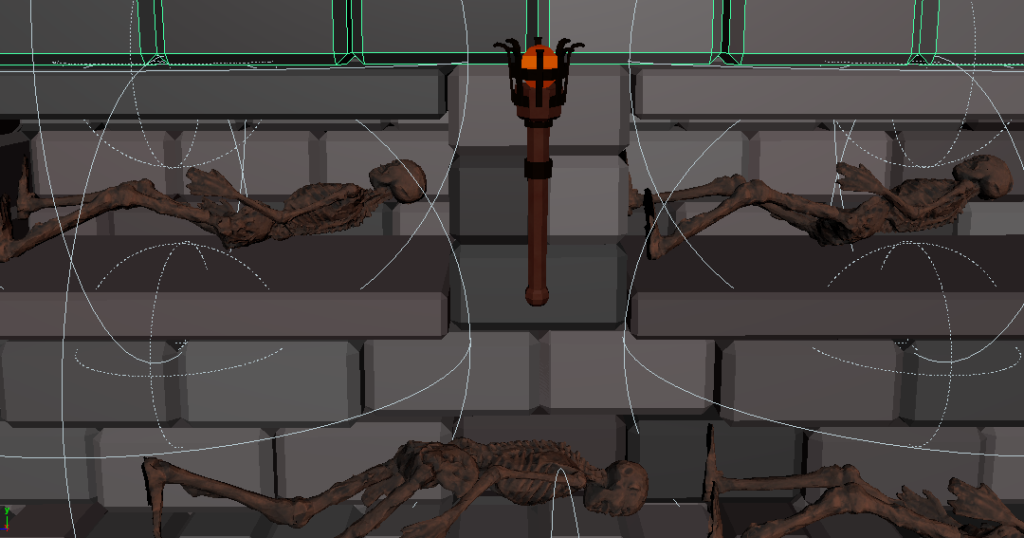
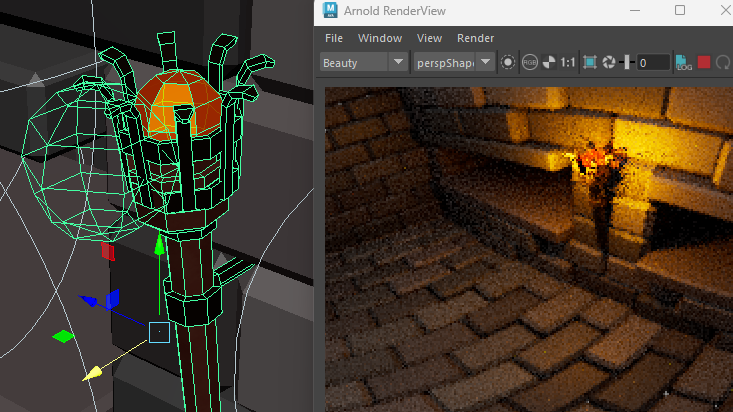
Anyways for the torches I placed them around where needed, adding an orange ball inside and a mesh light nearby, if it was inside it would trap alot of the light, so I placed it abit outside, making the light a bright orange to fit the theme.
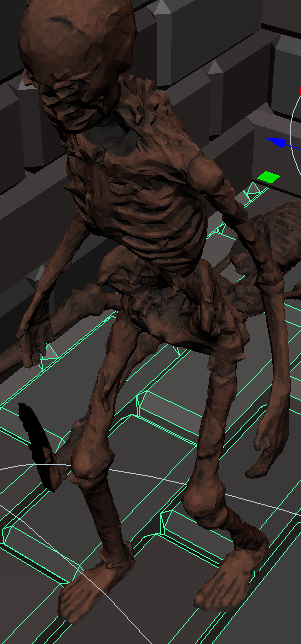
For the corpses I changed them from basically grey to a dark brown to be more realistic and to also fit the more burnt look I wanted, I also removed their skeleton as it was just for an Idle animation I didn’t need, then placed them around the tomb as needed.
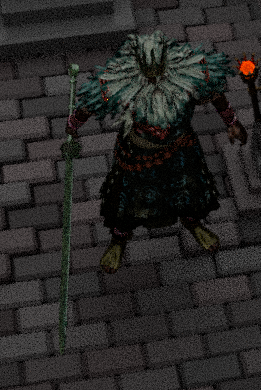
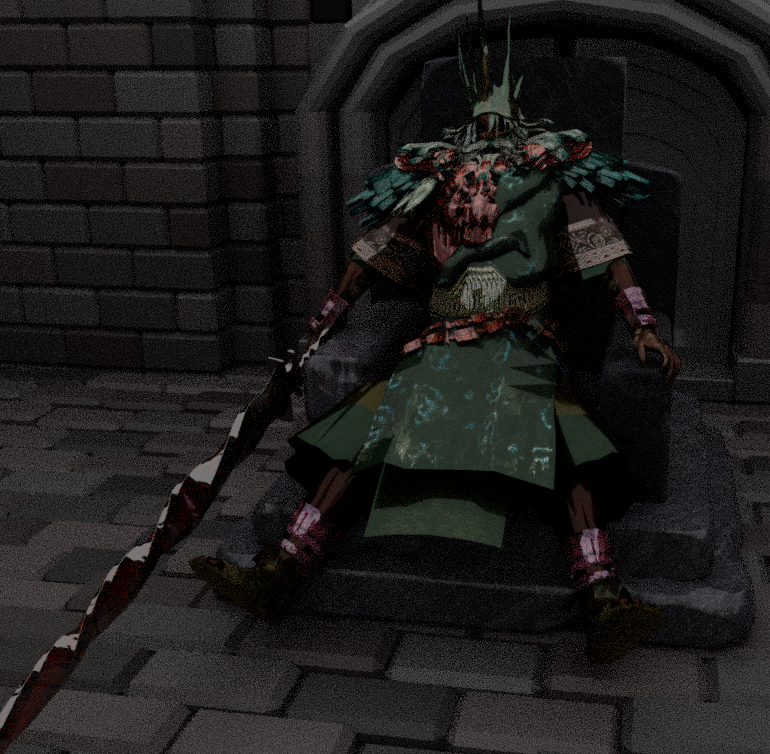
Then for the throne I simply put it together instead of the temporary throne I made, then sat Gwyn on top of it, replacing his sword with the one I got, as it stands out better and still fits the theme, if not better.
Gwyn:
Gwyn was a whole situation because of the animations he needed and my lack of experience with character animation, however through several attempts and help from others who did know, I eventually got something working, fixing his sitting from having his legs hang to placed on the steps, then having him step up and off, trying to minimise sliding.
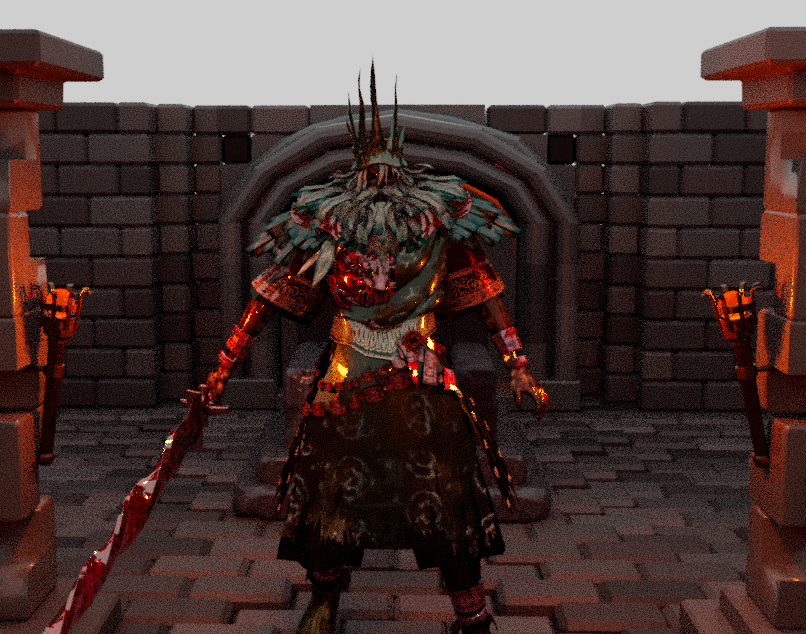
Then after this I tried to rig together a slash animation, but found an issue with the model itself, when you bend the elbow, the bracelet he wears stretches, half of it staying where it is when the arm is straight, meaning I couldn’t really get a good looking slash. I wanted him to curve his arm back, grabbing with both hands and slashing to involve both arms, but with what I got, it works, but leaves alot to be desired. Given my experience I accepted it would work, and was expecting some problems to pop up from an asset I got for free.
Lastly he was supposed to have more animations as seen from my timeline, but given my inexperience and lack of help at this point (the holidays had hit, barely anyone was in, not pointing blame with this), I spent alot longer than I should on getting to this point, meaning they had to be cut due to time. Especially because they would be around on par with what I have done currently with Gwyn, which I definitely don’t have time for, and given the issue I just specified, I’m not sure if I would be able to get the result I wanted.
Fire:
After sorting Gwyn I wanted to add the burning bodies scene, where he is powered up, which shouldn’t be that hard. All I did was copy my already made Flame MASH System, change it to be a wide flat plane over the corpse piles I made, and change the random seed so they would move randomly every second or so. They start under the ground, then raise up, then the amount of sparks increase, and then die down after but still lingering.
Now with that set up, I added another system to pick up once it starts to die down, these sparks travelling into Gwyn. I used the Curve network to connect 8 tendrils to Gwyn, using the amount, clip end and clip start to make the flames travel along, connecting and then the end breaking off as it all goes into Gwyn. All together this worked pretty well, not taking too long because of being stuff I had done before, already knowing roughly what I had to do.
I did plan for the embers to linger on Gwyn, but given the time restraints, I accepted I should just leave it here, having gotten the main part I wanted already.
Timeline Fixes:
I noticed as I went on that my timeline slowly drifted from accurate, the time labelled on it and the time in my scene having drifted. Leading me to going back and fixing this, adjusting the timeline to be more realistic given my knowledge on the parts I had made, having something more than estimation to go off now.
In void, flame come to, view coming from that – 5 secs (5)
Wake in cavern, lying down – 2 secs (7)
Gets up – 3 secs (10)
Time to look around the starting chamber – 5 secs (15) [Fixed 10 secs (20)]
Move to base of stairs – 2 secs (17) [Fixed 3 secs (18)]
Fade of black, reappear at top – 1 sec (18) [Fixed 4 secs (22)]
Look at door – 0 secs (18) [Fixed 3 secs (25)]
Walk to door – 5 secs (23) [Fixed 5 secs (30)]
Push door open – 6 secs (29] [Fixed 10 secs (40)]
Look at room inside – 5 secs (34) [Fixed 5 secs (45)]
Walk inside, up to throne half way – 5 secs (39) [Fixed 5 secs (50)]
Eyes light up – 0 secs (50) [Fixed 5 secs (55)]
Skeletons start to light on fire, giving to the king, their body now also being covered in flames – 7 secs (57) [Fixed 10 secs (65)]
King slashes at you – 5 secs (90) [Fixed 5 secs (70)]
I ended up doing this as I went, leading the fixed timeline to end here, however I was able to add a few scenes in post, these being as follows:
View goes back into the flame, it snuffing out – 5 secs (95) [Fixed 5 secs (75)]
[Inbetween pause scene 2.5 secs (77.5)]
They reach out, the flame relighting – 5 secs (100) [Fixed 5 secs (82.5)]
Then all other scenes were simply not in scope given the time.
Render and Editing:
I realised after rendering a few issues that I didn’t have time to fix, they are listed below:
- A corpse was left standing, this was the one I copied from, it breaks immersion but is around for awhile, so I left it because of the time it would take to render and fix this
- The lighting was brighter than I expected, however this would need a entire re-render to fix, it looked different when I check the render view so this couldn’t be avoided
- The fire color still seems off, and the fire tendrils for some reason have lost their color when in the render view, they are fine. I have no idea how to fix this and don’t have the time to try to, I tried re-rendering as this scene messed up anyways to no effect.
- You clip into the door a bit when pushing it, however I saw this as a minor problem, leaving it in due to time constraints
However, with all of this the product still does its job well I believe, it is just a shame I couldn’t fix these problems, but I wanted to show them so you know I’m not just ignoring them.
For editing I used two programs, Premier Pro to compress the render and Cap Cut as it is on my Ipad so alot more convenient and I have used it before for my own personal projects, so know how to use it when Premier Pro, I have basically never used. So I went into a Premier Pro project I already set up for compressing VR Videos, this saves fixing all the settings for this purpose, I import them as image sequence and do this for the original and the part I re-rendered:
I then export them again using the setting I preset and use google drive to transfer to my Ipad.
From there I put them in Cap Cut, putting in both parts and adding in the needed fade in and out affects via the Effects Tab and typing these in for the stairs and later both Fire Scenes.
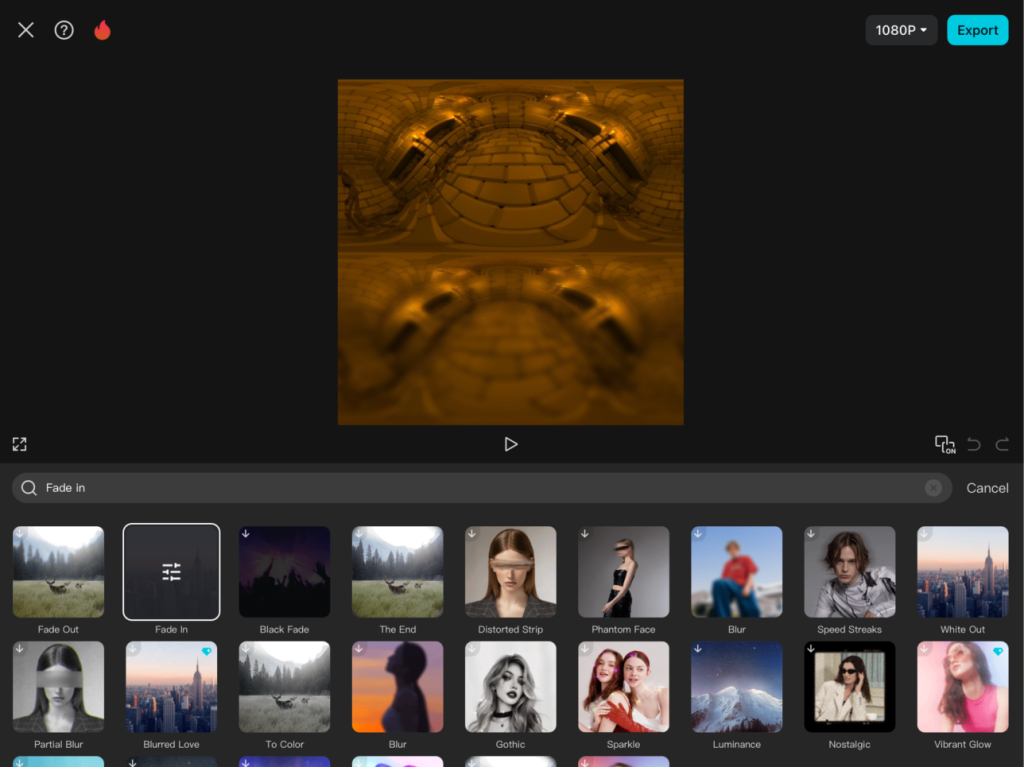
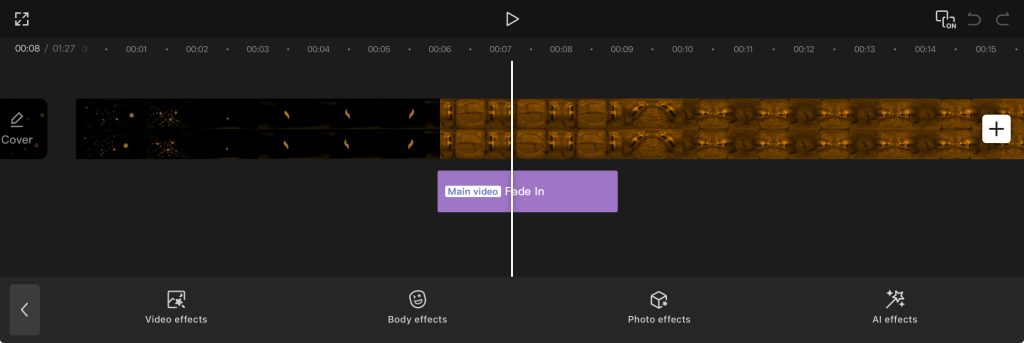
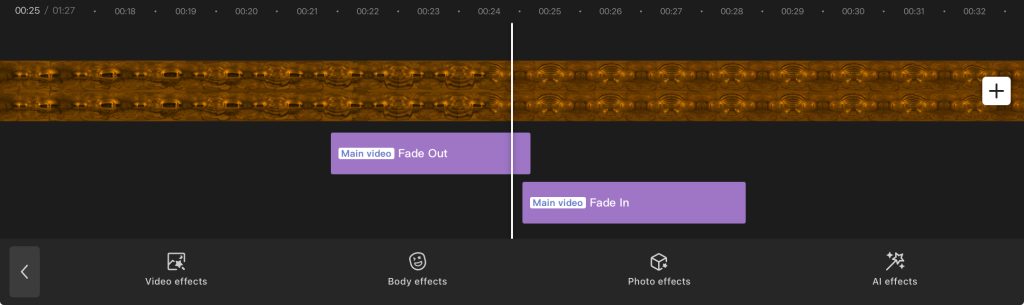
You can also change their intensity, for fade in and out effects this changes the length, I need 70 for both, making sure they just overlap so the blackness doesn’t flash out and appear back.
Then by using the split tool to cut where I needed to insert the second part, removing the split section.

I also did this for the fire section after being slashed along with the reverse tool for the effect I wanted of the flame dispersing and coming back together, adding in a empty pause like noted before by taking a Fire Scene to 2.5 secs and using the Mask Tool to just black it out fully, making it look like the flames fully dispersed, it is clunky but I think it does the job and at this point, I can’t go back and make it work better, so this will have to do.
With all that said the video is done, I could have added sounds but I don’t have the time to look for them sadly.
Final product:
Narrated Production Video:
https://drive.google.com/file/d/1HM4cg6gaOYwf8I7a5t_kTdbFKaZ_ycP6/view?usp=drivesdk