Effects
- Drone Boosters, Plan on having the drone flying around, and so need to make a effect for these so they actually make sense why the drone is in the air at all
- Dust, It is a abandoned facility, and so dust will not only help set the mood, but help add atmosphere
- Impact Effect, Plan on having several breaking set pieces, and so need a effect to show the dust or rubble being knocked up from this
- Scanner, The beginning door needs to make sure you’re allowed robot, and so a cool scanner effect will not only make sense for that, but look cool as well
- Electricity Sparks, There will be several parts where the player has exposed wires, same with decorations and the other robot in the sequence, and so this will be nice to have
Development
Drone Booster:
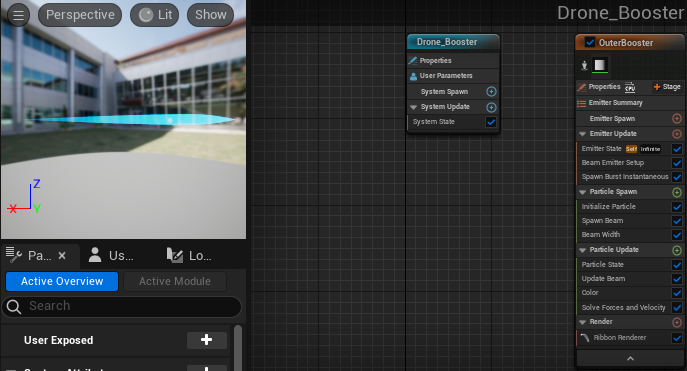
I started with the laser base from Niagara and colored it blue, making the laser also wider at the front and then get thinner, basing it on jet thruster flames.
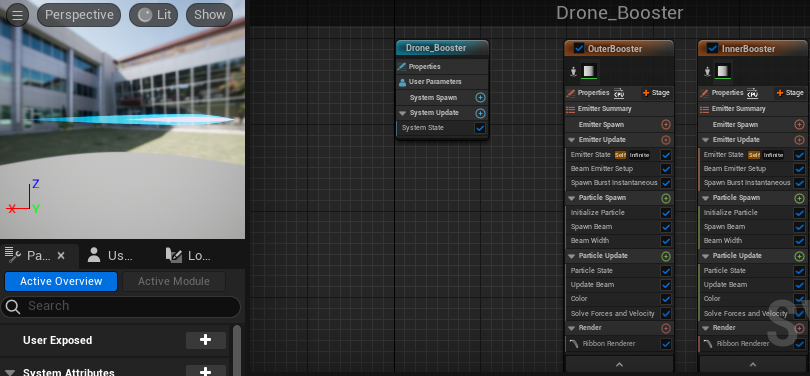
To then try and further this I added another smaller copy of the effect inside it, as most flames from jet thrusters have this inner purple flame.
I also made sure the limetime was 11 seconds, as it loops each 10, so the flames would stay constant instead of going out so the drone stays up.
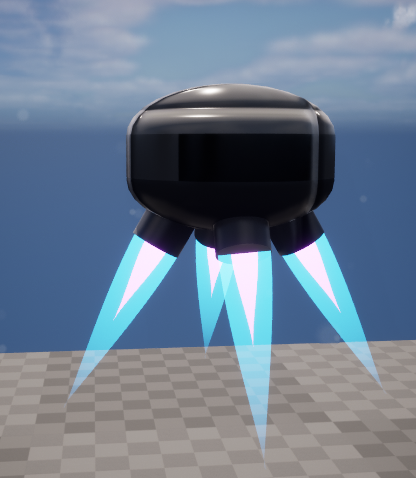
To make it work I had to shrink the effect as you can tell by it being a lot shorter so it would fit on the drone better.
Dust:
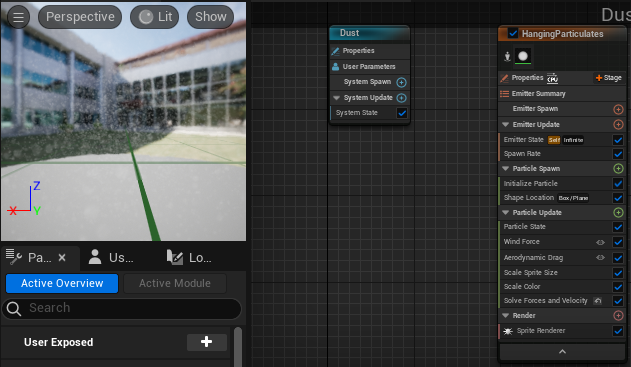
I started with a particle emitter from Niagara and made it a lightish gray, changing the spawn time and spawn limits to help make the dust more numerous and less easily missed.
Here is a scene with and without the dust added:
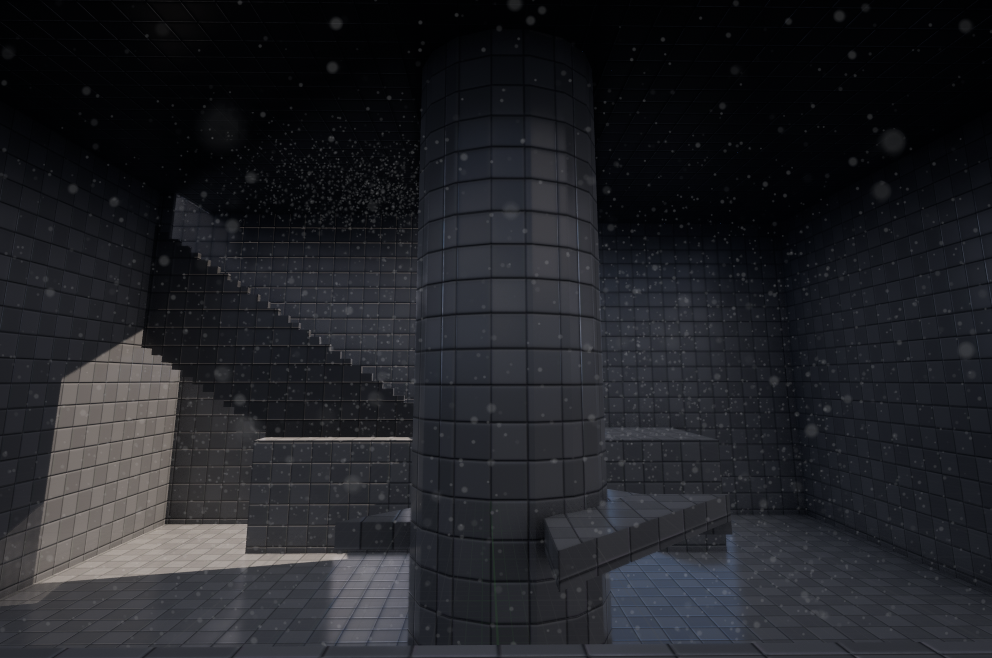
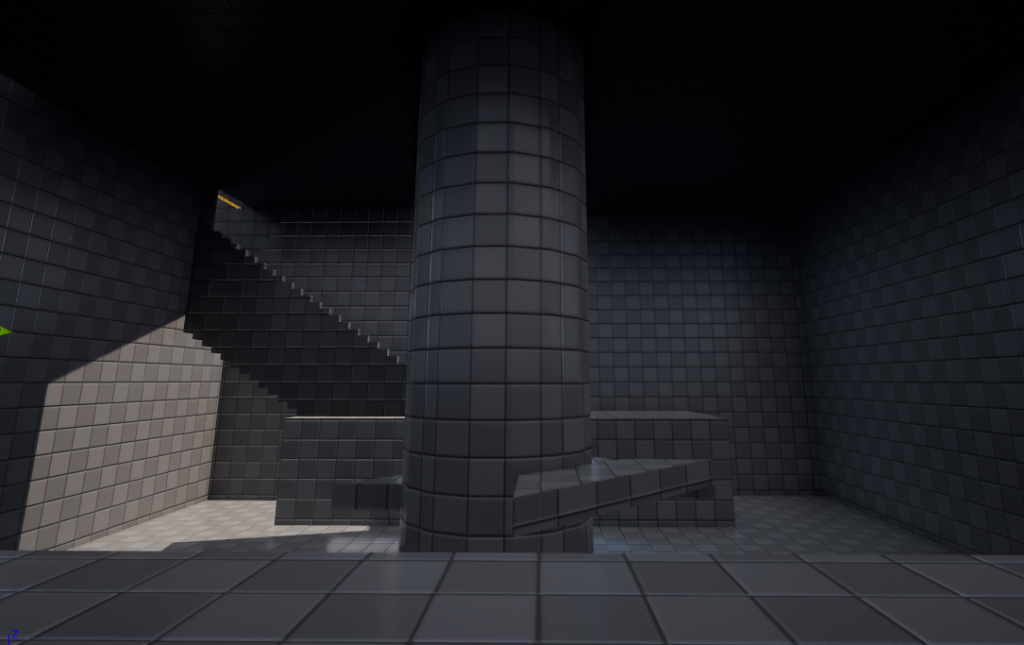
It doesn’t add much as I don’t want to over stimulate the player, but still adds to the atmosphere and makes sense for an abandoned facility to have.
Impact Effect:
For this one I ended up making 3 different versions while experimenting, here is each of them below:
Impact 1:
This one was made with the confetti effect as it had mainly what I wanted, but given you cannot change it from looking like paper like I had to drop it and try again.
Impact 2:
This one and Impact 3 are very similar, this was made with the burst effect, and so isn’t random in its burst, making the effect look a bit too artificial, and so I tried again to make it better.
Impact 3:
This is the one I ended up using, it uses the fountain effect as a base for a small burst with less velocity to make what looks like a burst. However, it is completely random where the dust appears, making it look better than the others in my opinion, and so I ended up using it for the sequence.
Scanner:
This effect was quite hard to figure out, being split into two parts.
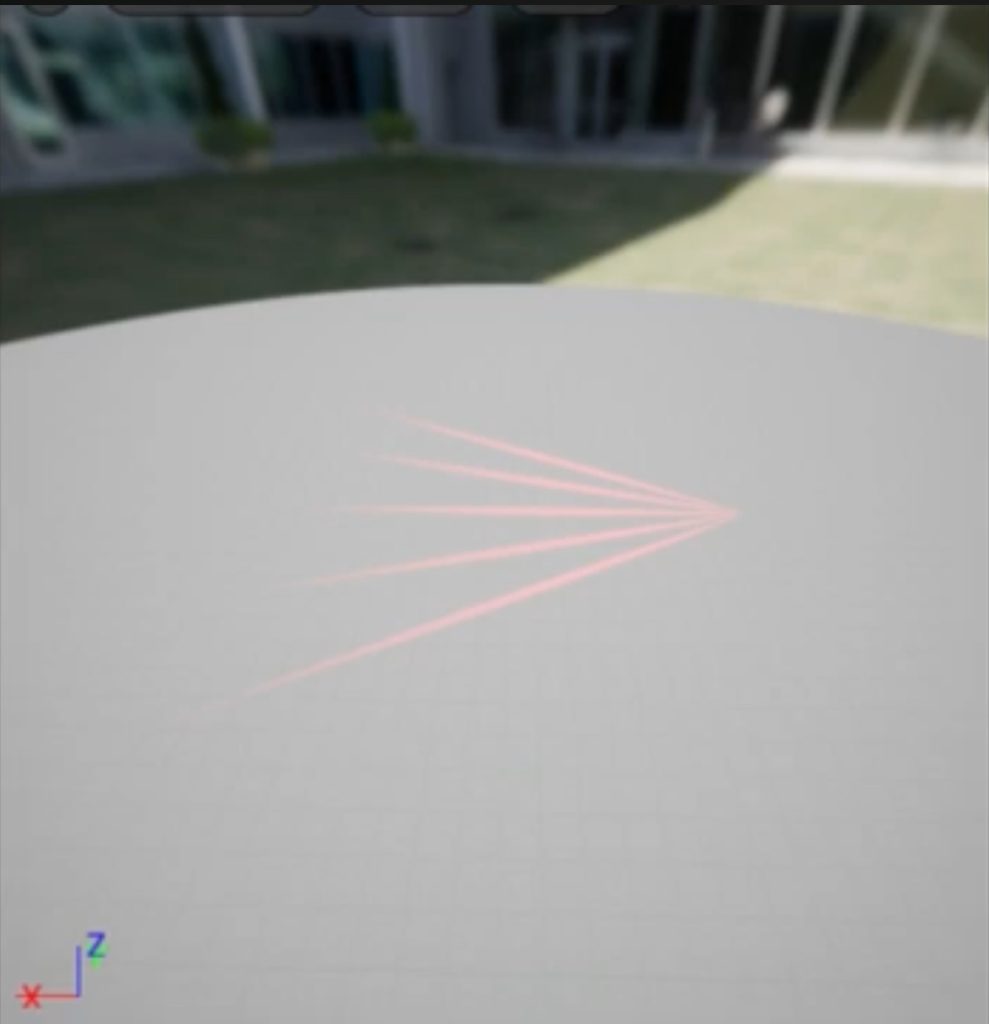
First I used the laser base to make each laser, making them red and in the formation I wanted, this wasn’t very hard, however the next step was.
As you can see I wanted the scanner to move around on activation, letting it actually look like scanning. I did this with the usage of float variables, these would move the lasers in arcs like shown, allowing for effects to be animated if needed in future.
I did however notice I needed to swap from the scanner faster than 10 seconds, and from inbetween scans, and so I ended up having the scanner go fully, where it was then broken up in editting to still get that effect without having to try break the effect up.
Electricity Sparks:
It is subtle but I feel does its job, showing the player or other devices are damaged and losing power. It was made for the Niagara Fountain base by making it take velocity and spawn particles at a 0.5 spawn rate so it doesn’t distract the player too much. This along with the character model being covered to match the bodies in the main room helps all of the environment to connect and feel related aswell.
Code:
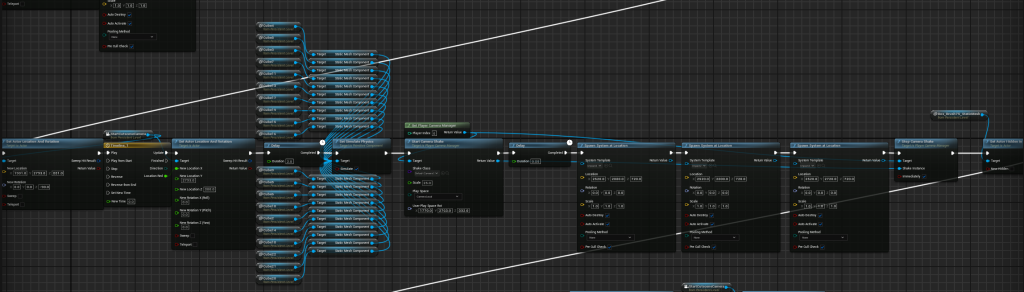
To make this work I had alot of code behind the scenes which I am going to explain here. Firstly here is a overview of all the code (did it all in the level blueprint so it could all interact with eachother easier)
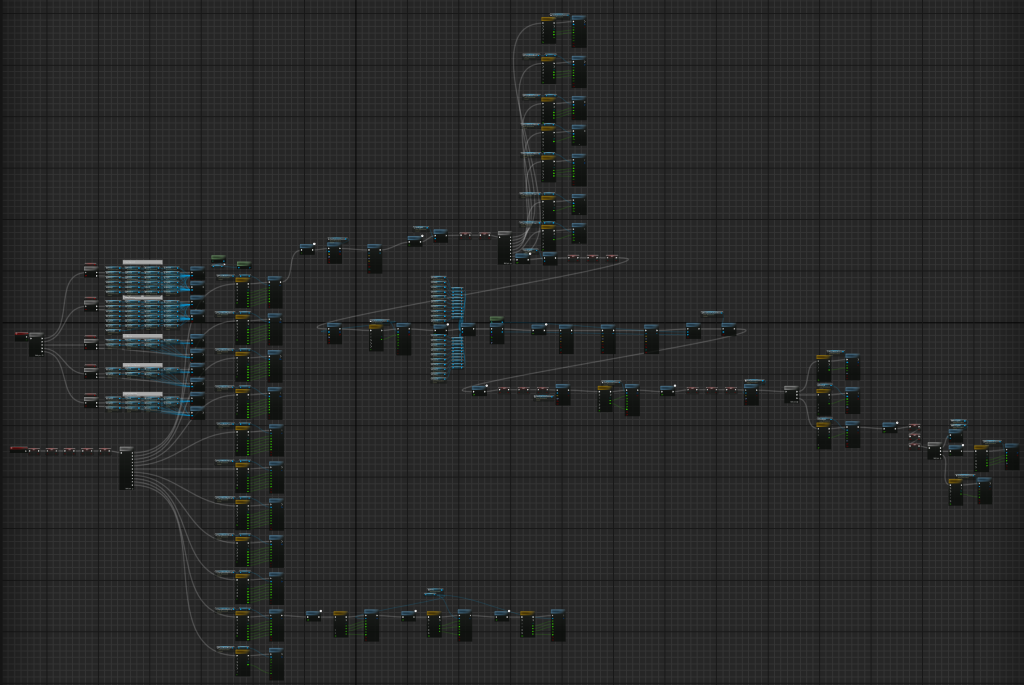
Lets start first with the top left part, what I call the Unloader.
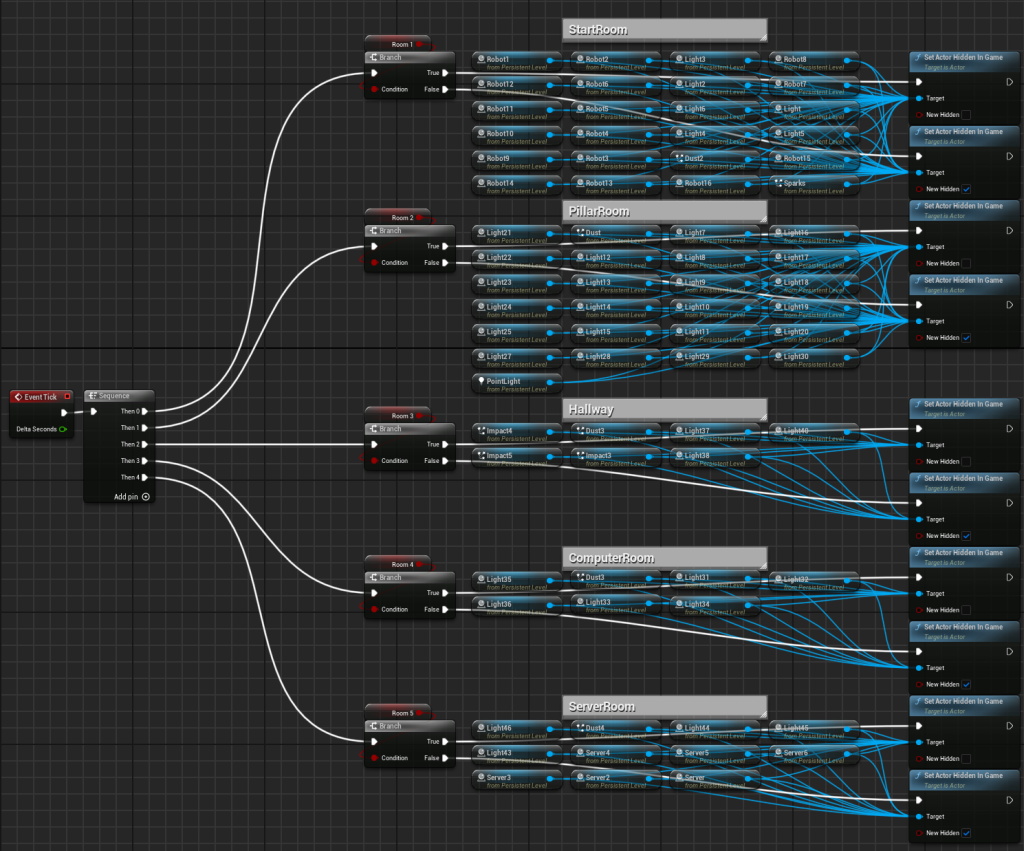
Now all this does, is every tick it checks if each room variable is active or not, if it is, all these lights are unhidden (as we might need them later), however if it is disabled then they are all hidden as this greatly helps performance when running the sequence. That is why inbetween transitions you see small red boxes, this is the code turning on the rooms it needs and turning off others.
Next is the openning sequence
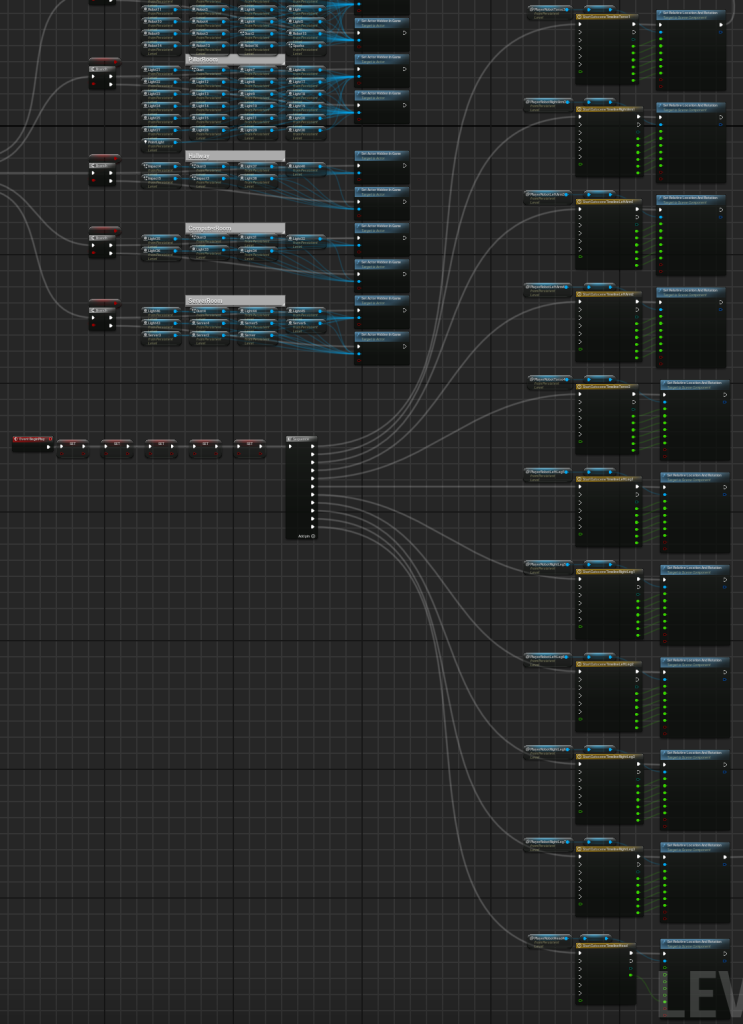
Okay so its by far the largest, but is actually very simple as it is just repeating the same process for alot of objects. It is the combination of a timeline and set relative location and rotation like this:
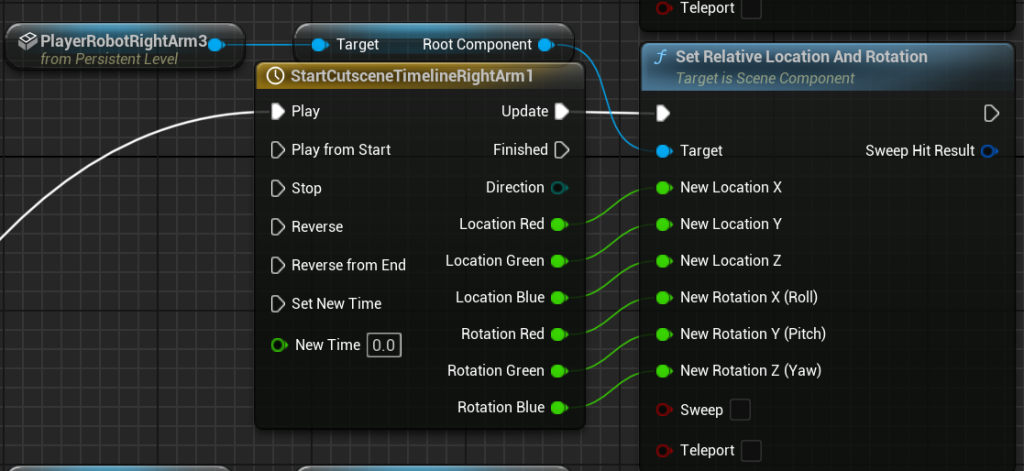
So all I’ve done is write down where the objects starts, and where it wants to go, this is then put in the timeline that starts and changes the value over time to the other. This is then put in each aspect of the objects location and rotation so it moves smoothly from point A to point B. The reason there are so many is because it is moving the body from lying down to sitting it, having to move basically every piece, and those that don’t are attached via a network to eachother, so when the torso moves, they all move, then when the arm moves, the lower part and hand also move exetra.
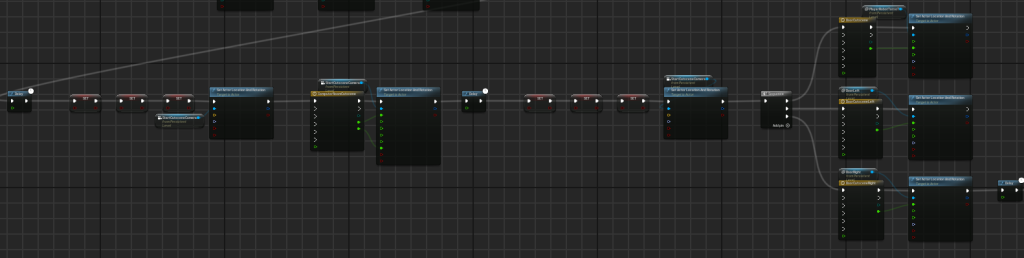
Next is the Scanner and Ladder section, called that for their respective scenes they are used for
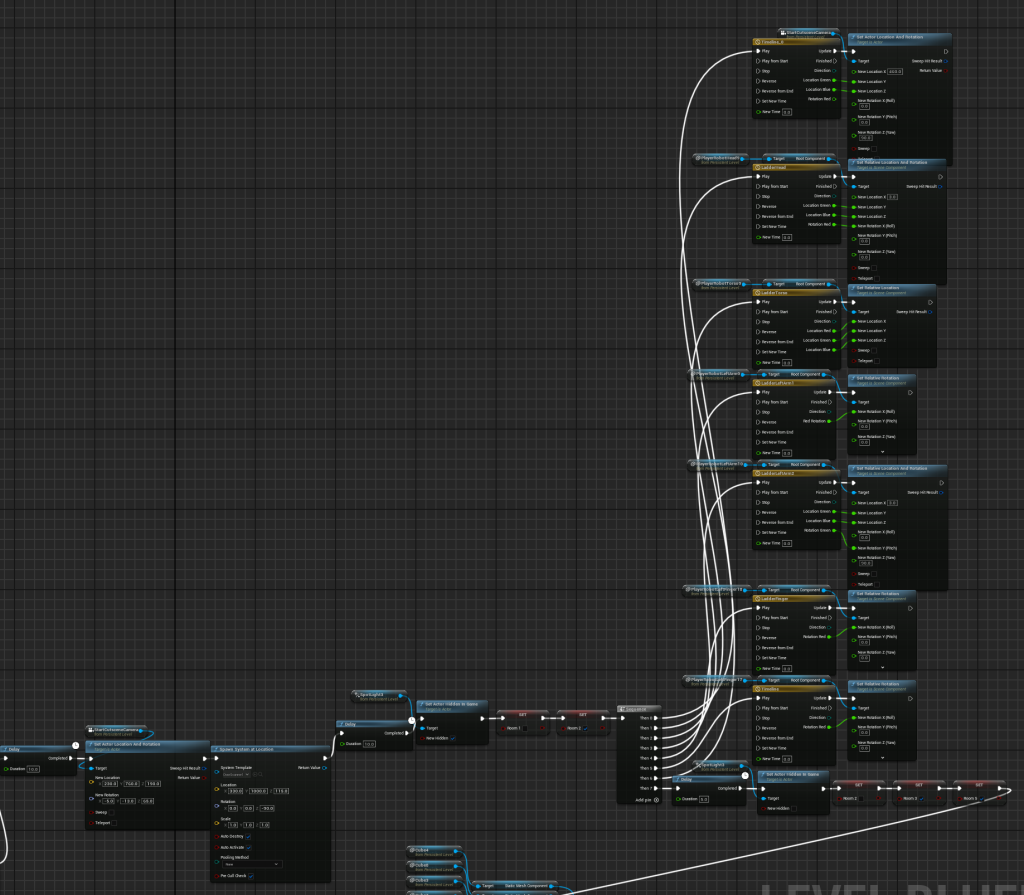
So first it uses delay to wait until the get up sequence is finished, then we move the camera (just set location and rotation as I just need to change scenes) and spawn the scanner effect. Then after that we delay again, turn off the spotlight I have on the camera as it makes this scene look worse with it on, otherwise it helps improve visibility. Then we turn off the first room and turn on the second, as we are changing rooms. Finally we repeat the moving set up but for this scene, less is needed as we never see the bottom half, so it doesn’t actually have legs at all. This is also where I learned to not add values that don’t change, such as keeping the rotation untouched if it never changed, same for location. Then we again wait, change the rooms set for the next scene and turn back on the spotlight. Now moving onto the Hallway scene.
This was actually not in the storyboards, I came up with it later on through Level Design to grab the player’s attention, it worked well and so I thought it would do well to use it here for that too. We do cover alot of the same ground here, we move the camera, set a delay, enable physics on the objects about to fall as otherwise they would cause unneeded lag when waiting. Then we activate a camera shake we disable later for the impact to have more effect, add short delay so we can spawn 3 of our chosen impact effects to show more of the impact that just happened, making it feel more real. Then we unhide a panel placed where the rubble falls out to hide the hole in the ceiling openned so it could all fall out. Next is the Office Scene and the Door Scene.
This scene is purely looking around, and so we change the activate rooms once again, teleport and start moving the camera. Then we swap the rooms again to do the door scene, the doors open as we move the character through them, it would have been more complicated (with leg movement and such) but my experience and what I used before would have taken too long to make this happen, and so I kept it simple. Lastly is the ending scene.
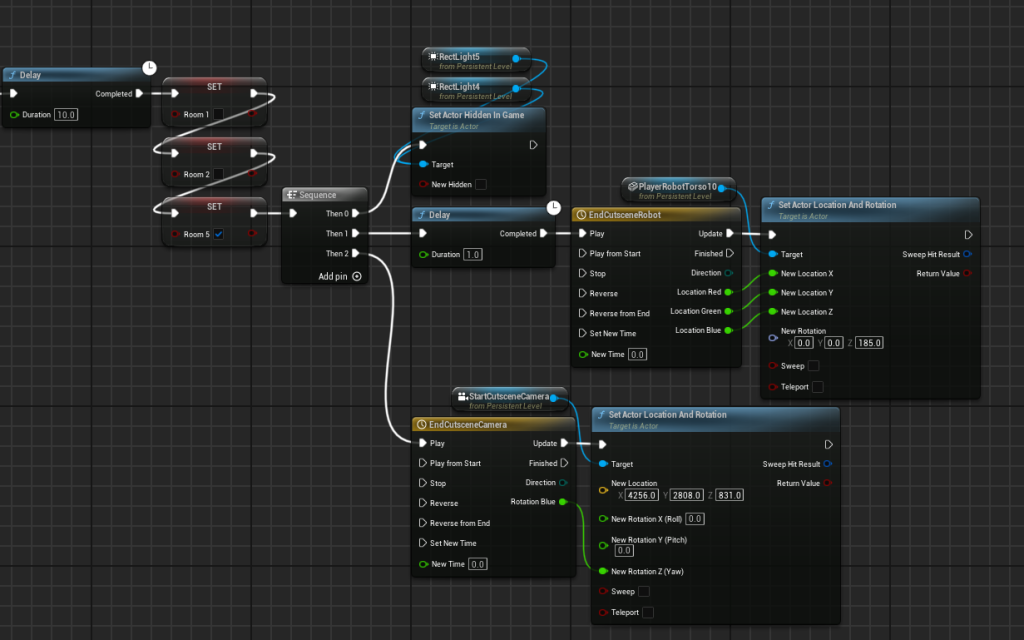
Again very simple, we set the rooms one last time and set the robots eyes visible (they were out of the unloader as they are only needed for this scene), along with a delayed move of the robot and moving of the camera.
With all of this together we get this sequence which I am quite happy with, however it does need editting and another scene added to it before it is completed. Here is the uneditted version, it was recorded with OBS studio as the recording sequence function wasn’t compatible with my sequence it seemed, so I will have to deal with the few lag spikes.